Limit Lines on the SSA3000X Spectrum Analyzer
October 23, 2017
The SIGLENT SSA3000X series of spectrum analyzers feature two limit lines that can be used to visually identify whether a signal or spectrograph meets or exceeds given parameters.
Limit lines can be used for:
– EMI Pre-compliance measurements using FCC/CISPR limit lines
– Transmitter testing: Is the signal in the proper band?
– AM NRSC measurements
SSA3000X Limit Line Features:
– Two limit lines can be activated at any time
– Each limit line can be either an upper or lower limit. Upper limits define maximum values and lower limits define minimums.
– Each limit line has two modes: Line or point. Lines are single lines that exist at a user-defined amplitude. Point defined limits are build using line segments and can be used to build complex limits, like NRSC masks.
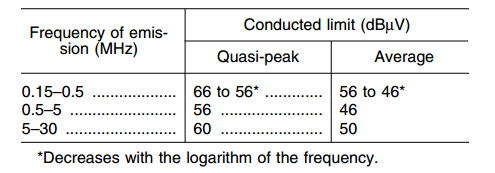
In this FAQ, we are going to build an upper limit line based on the conducted emissions for a class B unintentional radiator per the FCC Subpart 15 regulations using the point method.
The specifications for FCC Subpart 15, Class B unintentional radiators is given as:
1. Configure the instrument to cover the frequency span of interest (150 kHz – 30 MHz, in this case) by pressing the button marked Frequency on the front panel and entering the start and stop frequencies.
2. The limits are given in amplitude units of dBuV. To set the SSA units, press Amplitude and set Units to dBuV.
3. Press the Limit button to open the Limit menu. Set Limit1 to ON to activate the Limit menus.
4. Press Limit1 Edit > Set Type to Upper
5. Set Mode to Point
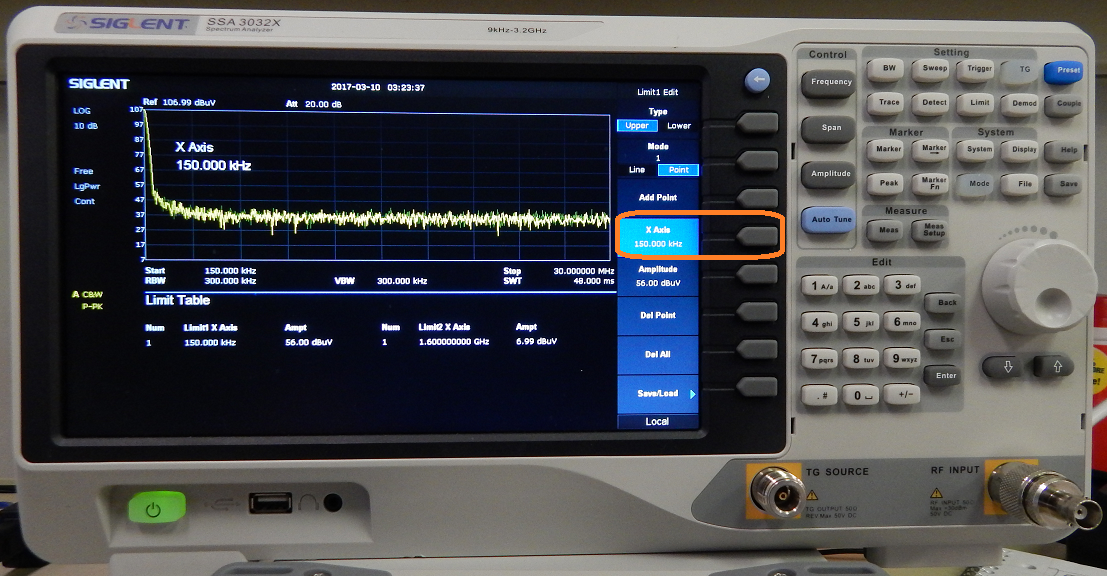
6. Press the grey colored soft key next to the entry labeled X Axis and enter the frequency for the first data point, 150 kHz
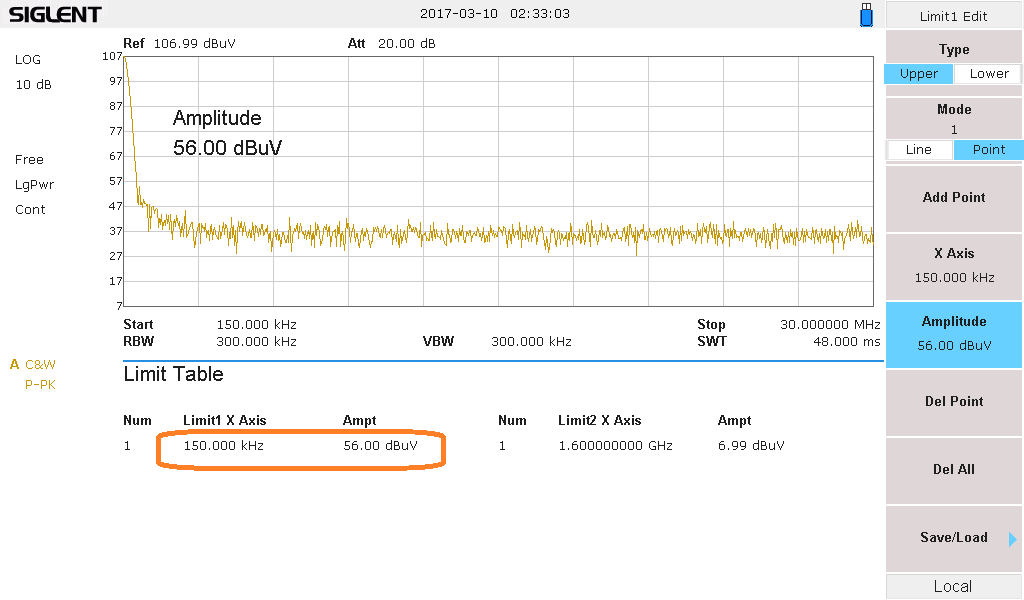
7. Press the grey colored soft key next to the entry labeled Amplitude and enter the Average start amplitude, 56 dBuV. If using a Quasi-peak detector, use the Quasi-peak values of the chart.
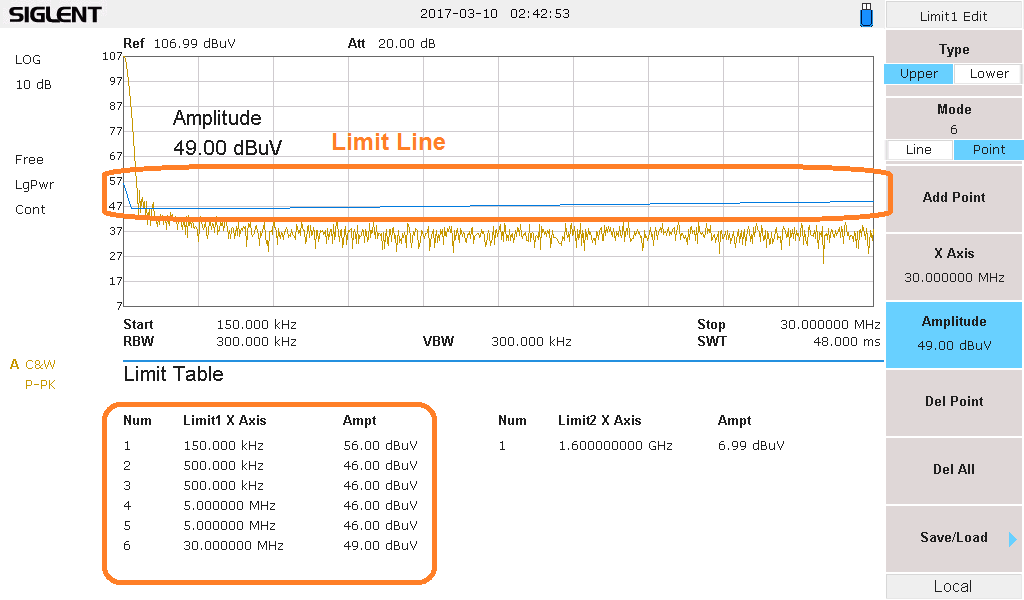
8. Press Add Point and enter X Axis and Amplitude values for the second point, 500 kHz and 46 dBuV. Now, we have two points (1 and 2) form the first line segment of the limit line.
9. Press Add Point to enter the third point, which corresponds to the start of the second line segment. Note that the end point for one line segment has the same value as the starting point of the next line segment.
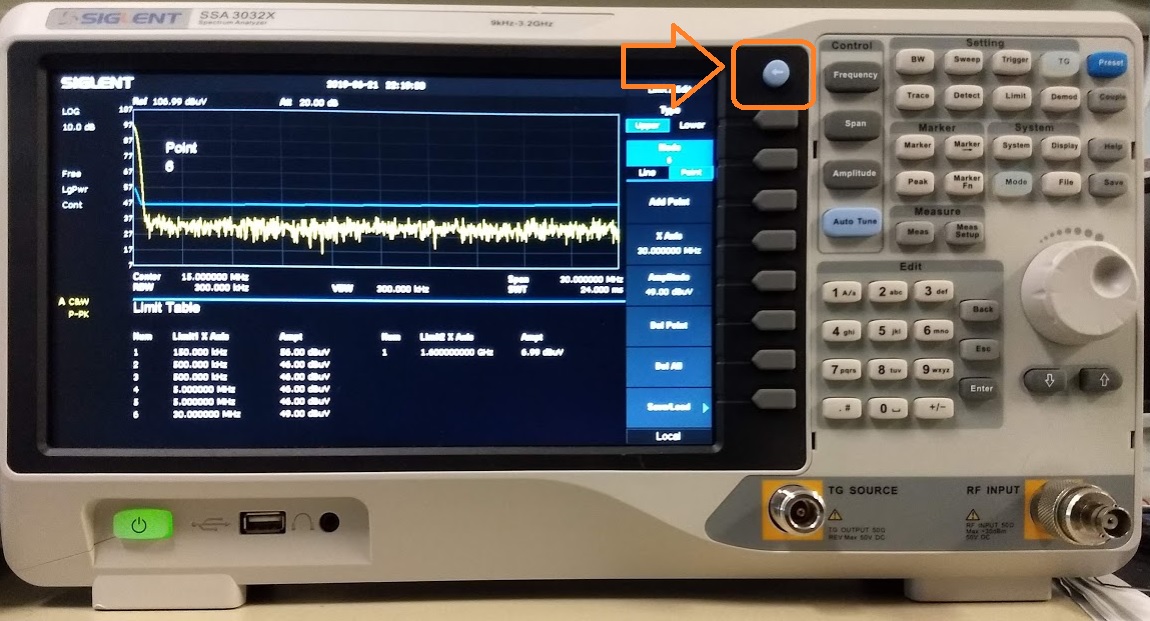
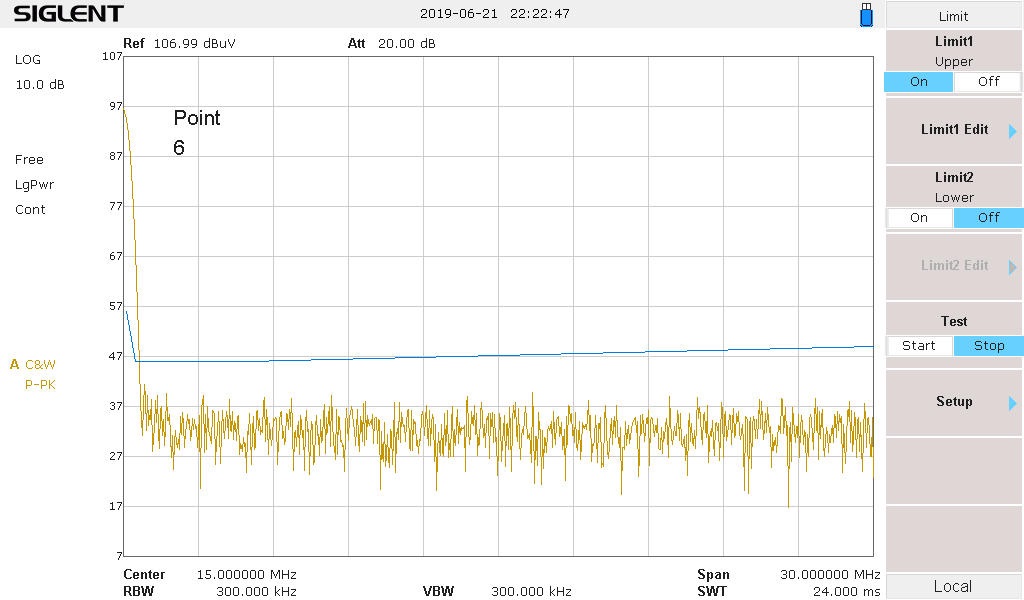
10. Continue to add points until you have finished the entire limit line. Confirm that the limit line and corresponding table match your limits
11. You can go to a full-screen limit line view by pressing the “back arrow” shown below:
12. Save the limit line to internal memory or an external USB memory stick using the Save button