Datalogging with the four-channel SDS1000X-E oscilloscope models
August 30, 2021
Datalogging
Numerous test and measurement applications require data acquisition over a long time duration. Instead of milliseconds of measurement time, you may need tens of
minutes or even hours of data. Normally, a data acquisition system is used for this type of application. But this may require developing software and troubleshooting
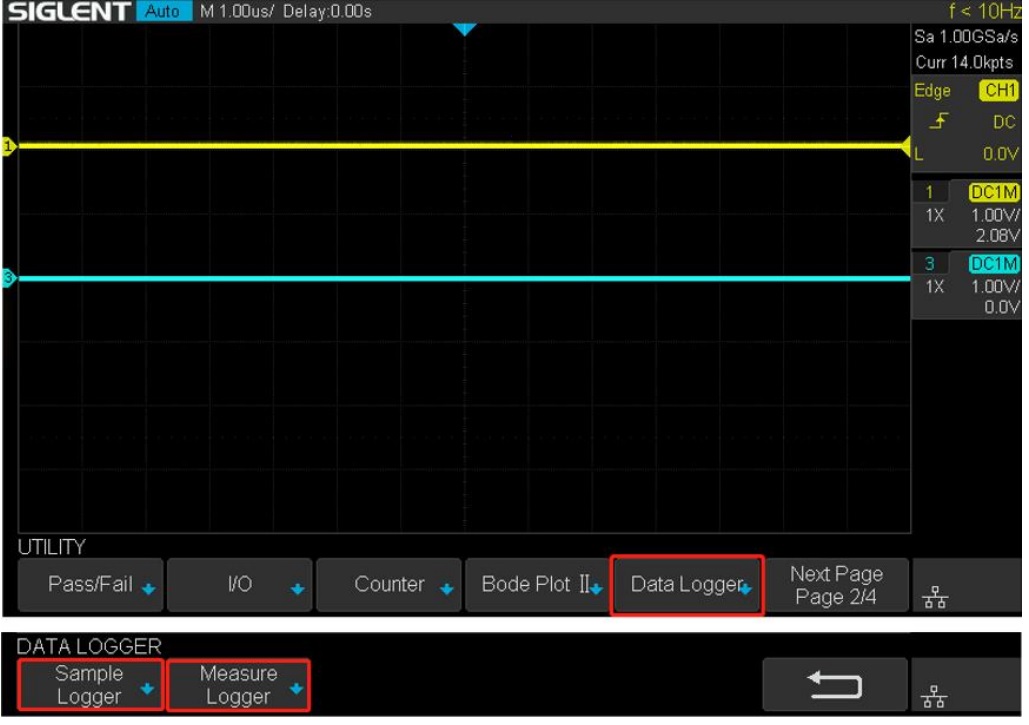
code. SIGLENT has added a data logging mode to the four channel SDS1000X-E oscilloscope series that makes it easier than ever to collect long-time duration data. The SIGLENT Data Logger continuously records original sampling points and measurement values.
Setting the System Time
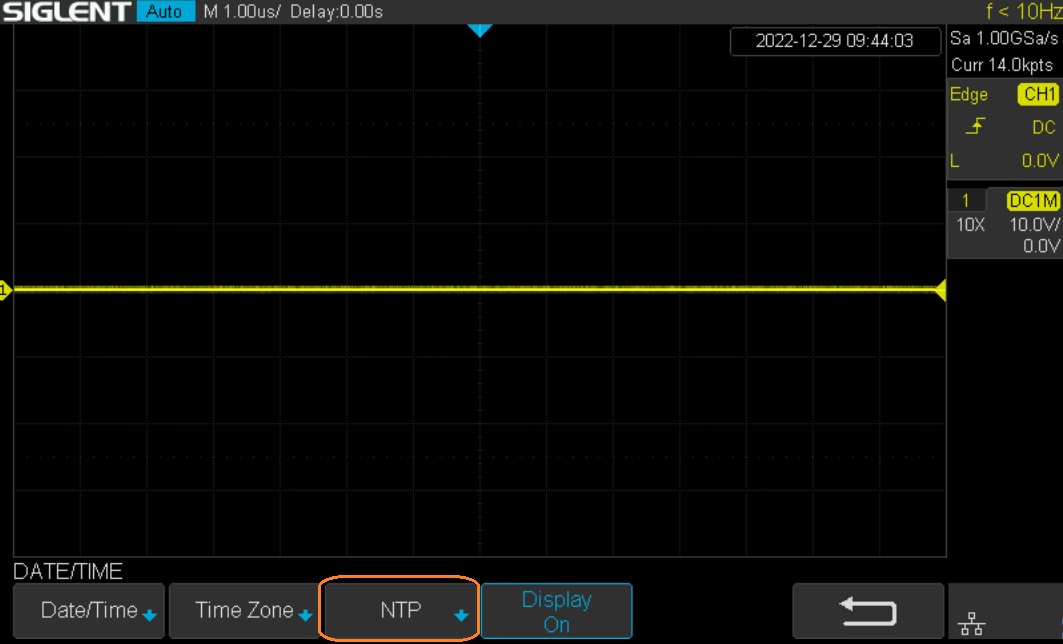
The SIGLENT SDS1000X-E oscilloscopes do not have a system clock. If you want the time of the data logger to be the correct time, you need to set the system time after power on. You can set the system time manually or configure the network time server address to get the time from the network time server through NTP as shown below:

You can also have the oscilloscope automatically use the NTP connection to reset the date/time if it loses power.
- Set up the NTP server as shown above
- Press NTP:
3. Turn on Power On Sync. You can also have the scope periodically update the date/time by activating the Periodic Sync feature:

The Sample Logger
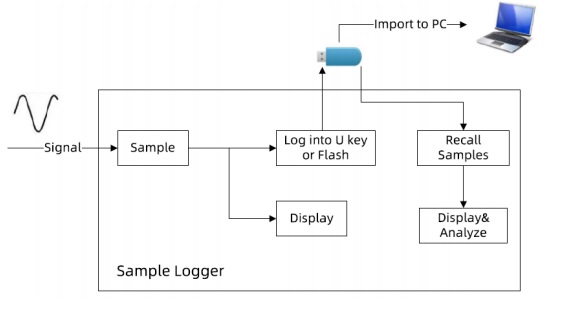
The Sample Logger continuously samples and stores measurement points. It is ideal for the long-time observation of low-speed signals. Because the original points are recorded for a long time, the amount of data can be very large. Since the DDR memory of the oscilloscope is limited, the sampling points are saved to the internal flash of the machine or an external U disk (USB memory
device) in real-time. After stopping the acquisition, the user can not only look back at the sampled points on the oscilloscope but can also analyze the saved data on the computer.
Sample Logger Pre-test Considerations
The Sample Logger logs the enabled channels.
Before beginning, you should:
1. Configure the scaling, type, and enable the required input channels so that each can collect the signals you wish to record.
2. What’s the sample rate of Sample Logger based on your settings?
3. How long do you wish to log data?
4. Calculate the amount of data required.
5. Decide to log to internal flash memory or an external U disk.
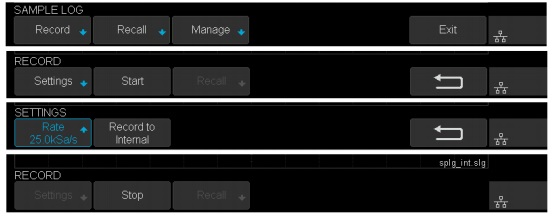
Logging with the Sample Logger
The steps to log:
1. Enable the channels and set the channel parameters.
2. Enter the Sample Logger and config the parameters.
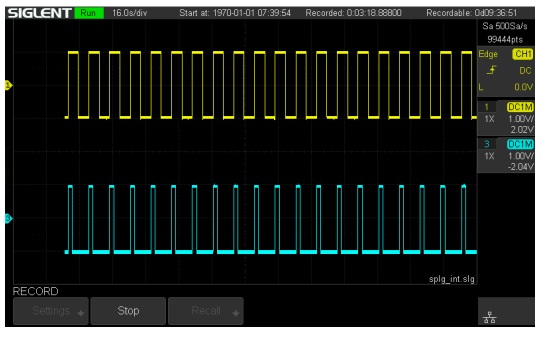
3. Start and stop logging In order to reduce the amount of data logged and speed up the logging, the log file is recorded as binary, and the file name is *.slg.
The file format is described in the “how to extract data from the binary file.docx” document. Please download this document from an
official SIGLENT website.
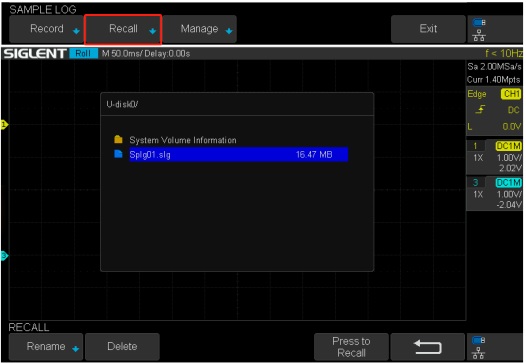
Recall a logged file in the Sample Logger
The Sample Logger can recall samples from a U disk or flash memory to the scope where they can be viewed and analyzed. The DDR of the oscilloscope is limited. If the waveform data exceeds the DDR capacity, the U disk will be read during operation, so please do not pull out the U disk when analyzing the samples.
1. Recall samples.
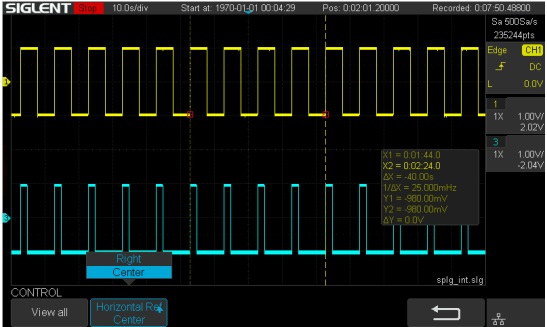
2. Use the time base and delay knob to adjust the waveform.
3. Use the cursors.
Analyzing a Sample Logger file on a PC
In order to analyze on the PC, the logged file in the flash can be exported to U disk (USB memory stick).

The oscilloscope provides a tool for converting logged files (.slg) to CSV: file converter. You can export this tool in the save/recall menu of the oscilloscope or from the oscilloscopes web page (four-channel X-E models, only).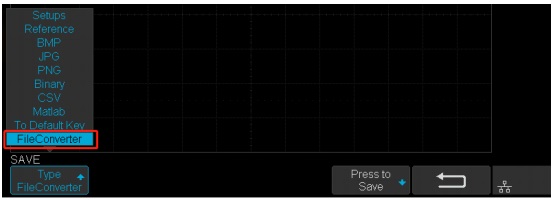

You can also parse the *.slg file with your own program. The file format is described in the “how to extract data from the binary file.docx” document. Please download the document from an official SIGLENT website.
Data Logger: Measure Logger
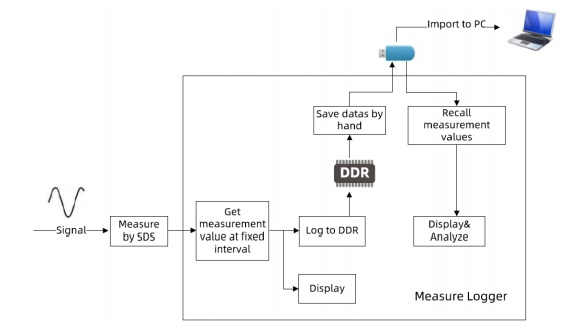
The measure logger collects measurement samples and shows the trending over time of low-speed signals. Because the amount of measurement data is relatively small, in order to process it quickly, the data is logged in the oscilloscope memory. After logging is complete, the data can be saved into the internal flash or external U disk, and imported to the PC.
Measure Logger Pre-test Considerations
The measure logger logs the currently selected measured items.
Before beginning, you should think of:
1. What are the measured items you want to log?
2. What is the sample interval and duration you require?
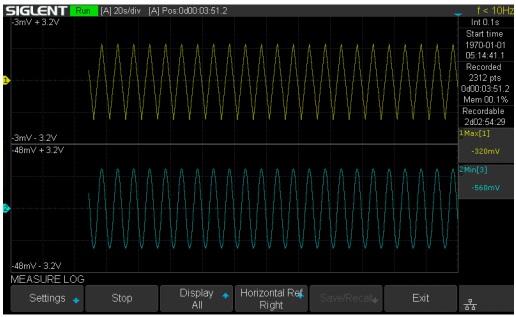
Logging with Measure Logger
1. Enable the measurement items you want to log.

2. Enter the Measure Logger and config the parameters.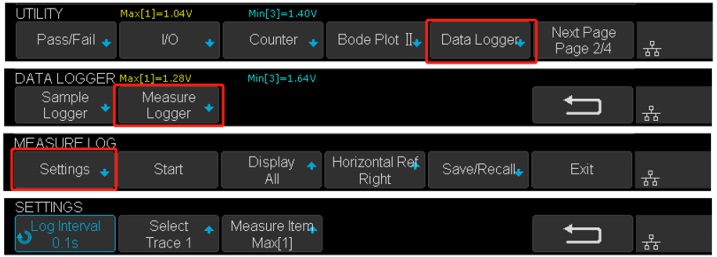
3. Start and stop logging.

Analyze, Save and Recall the Measure Logger data
- Use the time base and delay knob to adjust the waveform.
- Use the cursors.
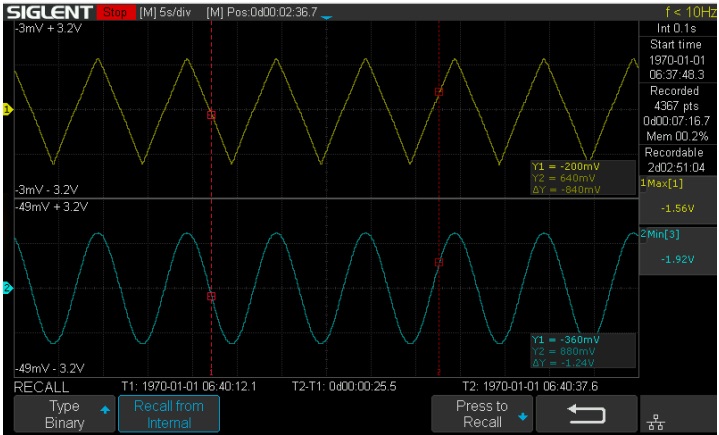
3. Save and Recall the logged data.

You can save the logged data into Flash or U disk. The logged file is saved as binary, and the file name is *.mlg. The file format is described in the “how to extract data from the binary file.docx” document. Please download this document on the official website of Siglent.
Analyzing a Measure Logger file on a PC
In order to analyze on the PC, the logged file in the flash can be exported to a U disk. The oscilloscope provides a tool for converting logged files (.mlg) to CSV: file converter. You can export this tool in the save/recall menu of the oscilloscope or on the web page.

You can also parse the *.mlg file with your own program. The file format is described in the “how to extract data from the binary file.docx” document. Please download the document from an official SIGLENT website. For more details about the specification o